There are several resource about running PHPUnit tests in a WordPress plugin with Docker. Here I want to share how I do it. You can find the configuration files in Github.
I explain how to create the development instance in 5 steps:
- The folder structure
- Build a docker image to host the WordPress site
- Configure the testing environment in your WordPress container
- Docker compose to launch the containers
- Run tests while coding
1. The folder structure
Let’s start creating a folder to host all the docker configuration files and the WordPress code including the plugin source files.

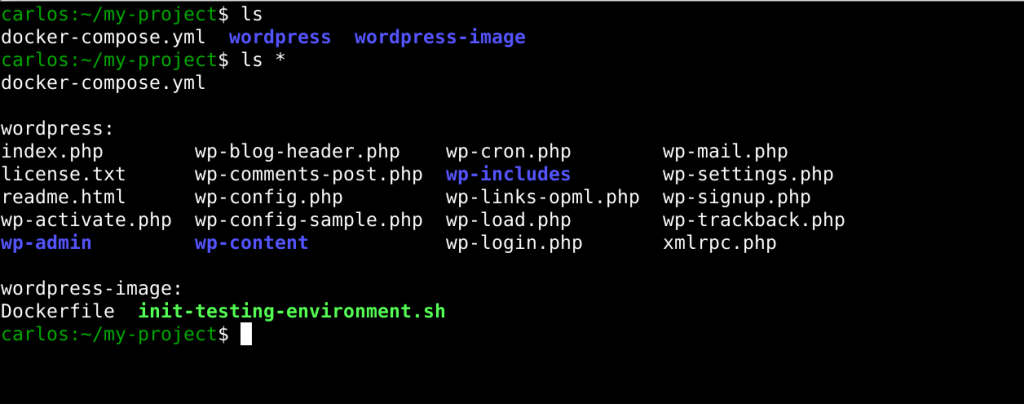
This is a picture of how the folder will look at the end. my-project is the root folder of the project. The wordpress-image folder contains the Dockerfile and an the entry point script for the WordPress environment. The wordpress folder contains the files of WordPress and the plugin to work on.
I use to run the wp-cli tool as the www-data user instead as root. So I assign www-data as group and my user as owner of the wp-content folder inside the wordpress folder. Then I give write access to the group to the wp-content folder. In this way, www-data is able to write on those files without problem and I can edit the files from outside Docker with my user.
2. Build a docker image to host the WordPress site
I built a custom Docker image based on the official Docker image for WordPress. The purpose of this custom image is to setup the development instance to run the unit tests automatically. This file is placed inside the wordpress-image folder. Next is the Dockerfile of the image:
#1. Docker base image
FROM wordpress:php7.4-apache

#2. Install WP-cli and dependencies to run it
RUN apt-get update \
    && apt-get install -y \
      less \
      subversion \
      sudo \
      default-mysql-client-core \
    && curl https://raw.githubusercontent.com/wp-cli/builds/gh-pages/phar/wp-cli.phar -o /usr/local/bin/wp \
    && chmod +x /usr/local/bin/wp

#3. Create the files for the testing environment
RUN \
    #3.1 Install phpunit
    curl -L https://phar.phpunit.de/phpunit-7.phar -o /tmp/phpunit \
    && chmod a+x /tmp/phpunit \
    #3.2 Install wordpress
    && cp -r /usr/src/wordpress /tmp/wordpress \
    && curl https://raw.github.com/markoheijnen/wp-mysqli/master/db.php -o /tmp/wordpress/wp-content/db.php \
    #3.3 Install the testing libraries
    && svn co --quiet https://develop.svn.wordpress.org/tags/5.3.2/tests/phpunit/includes/ /tmp/wordpress-tests-lib/includes \
    && svn co --quiet https://develop.svn.wordpress.org/tags/5.3.2/tests/phpunit/data/ /tmp/wordpress-tests-lib/data \
    #3.4 set owner and permissions
    && chown -R www-data:www-data /tmp/wordpress \
    && chown -R www-data:www-data /tmp/wordpress-tests-lib

#4. Copy the script to create the testing environment when the container is started
COPY init-testing-environment.sh /usr/local/bin/

#5. Run the script and send as an argument the command to run the apache service
ENTRYPOINT ["init-testing-environment.sh"]
CMD ["apache2-foreground"]
The section #1 in the Dockerfile shows the base image used. In this case the container will run WordPress in a Apache web server running PHP 7.4. You can see other options of images for WordPress in Docker Hub.
The script installs wp-cli in the section #2 . This tool is required to create the testing environment to run unit tests with WordPress easily. I run the wp-cli as the www-data user using the sudo package. Subversion downloads the testing libraries in the next section of the script. The mysql client package is used to check the connection to the database in the configuration of the testing environment later.
The section #3 creates the files for the testing environment. It is not required to download these files again when the container is started. In this way, there is a saving of data downloaded but mainly the container starts faster. It creates the WordPress instance for testing and download the libraries used by WordPress to run PHPUnit. This section does part of the job of wp scaffold plugin-tests which will be invoked when the container is launched.
In sections #4 and #5, the entry point script is copied and its parameters are configured. More about this script follows in the next section.
3. Configure the testing environment in your WordPress container
In the Dockerfile above, when the container starts, it runs a custom script instead running the Apache service. This script basically finishes the testing environment if it is not complete yet before launching the Apache service. This script is based on the steps to create a testing environment in WordPress and it is placed inside the wordpress-image folder.
#!/bin/bash

cd /var/www/html/

#1. check if wordpress is already installed/configured
if (sudo -u www-data -- wp core is-installed)
then

	#2. check if the database is ready
	if ! (sudo -u www-data -- wp db check)
	then
		# wait a moment for the database container
		sleep 1
		exit 1;
	fi

	#3. init the testing instance
	sudo -u www-data -- wp scaffold plugin-tests $WP_PLUGIN_FOLDER --force
	cd wp-content/plugins/$WP_PLUGIN_FOLDER && sudo -u www-data -- bash -c "./bin/install-wp-tests.sh $WP_TESTS_DB_NAME $WORDPRESS_DB_USER $WORDPRESS_DB_PASSWORD $WORDPRESS_DB_HOST latest true"
fi

#4. back to the root WP folder
cd /var/www/html/

#5. execute the entrypoint of the parent image
bash docker-entrypoint.sh "$@"
The script checks if the WordPress instance is already configured in the section #1. The configuration of the testing environment requires the WordPress site to be already installed. If it is not active, then it skips the sections #2 and #3 and launches the container.
In the section #2 of the script, it checks if the WordPress instance have connection to the database. If it is not the case, then it finish with error core but it sleeps for a bit first to give some time to the database to be ready.
The section #3 uses wp scaffold plugin-tests to create the configuration for the environment to run PHPUnit. One of the configuration files is install-wp-tests.sh. The install-wp-tests.sh script creates the WordPress instance in the tmp folder by default. I already created this instance in that folder in the previous step. The script doesn’t download the WordPress files again because the WordPress files are already in the folder. The docker compose file, explained in the next step, passes the values for the variables like WP_TEST_DB_NAME or WORDPRESS_DB_USER.
The last 2 sections in the script just move back to the main folder and executes the default entry point of the WordPress Docker image.
4. Docker compose to launch the containers
The next step is to create a docker file to run easily the backend and the database containers.
version: '3'

services:
    db:
        image: mysql:5.7
        volumes:
            - db-data:/var/lib/mysql
        ports:
            - "3360:3306"
        environment:
            MYSQL_ROOT_PASSWORD: password
            MYSQL_DATABASE: wordpress
            MYSQL_USER: wordpress
            MYSQL_PASSWORD: password

    wordpress:
        depends_on:
            - db
        build: ./wordpress-image
        ports:
            - 8080:80
        restart: on-failure
        volumes:
            - ./wordpress:/var/www/html
        environment:
            WORDPRESS_DB_HOST: db:3306
            WORDPRESS_DB_USER: wordpress
            WORDPRESS_DB_PASSWORD: password
            WORDPRESS_DB_NAME: wordpres
            WP_TESTS_DB_NAME: wptests
            WP_PLUGIN_FOLDER: my-plugin-folder

volumes:
    db-data:
The first service in the docker compose file launches the container for the database. It is based on the MySQL Docker image. The values for passwords, database and user names are values that you configure at your wish.
The second service is used for the WordPress container. It is based on the custom WordPress image that I created in the step 2 explained previously. This container uses a volume for the root folder of the WordPress instance. The values used to configure the database connection of the WordPress instance should match the values used for the database container. The official WordPress Docker image doesn’t use the variables WP_TEST_DB_NAME and WP_PLUGIN_FOLDER. The script explained in the step 3 uses these custom variables. The first variable is the database name used to run the PHPUnit tests. The second variable is the name of the plugin folder under development and testing.
Last to highlight is the directive restart with value on-failure that allows this container to try to be launched again if the script to create the testing instance fails or if there is another problem starting the container. In example, if the database is not ready as we saw in the previous step.
5. Run tests while coding
The development and testing environment is ready after all this configuration. First go to the project folder and lunch the containers using docker-composer up. The testing environment will not be configured until you have configured the WordPress site. After lunching the containers by first time, you would need to visit localhost:8080 in your browser to setup the WordPress site.
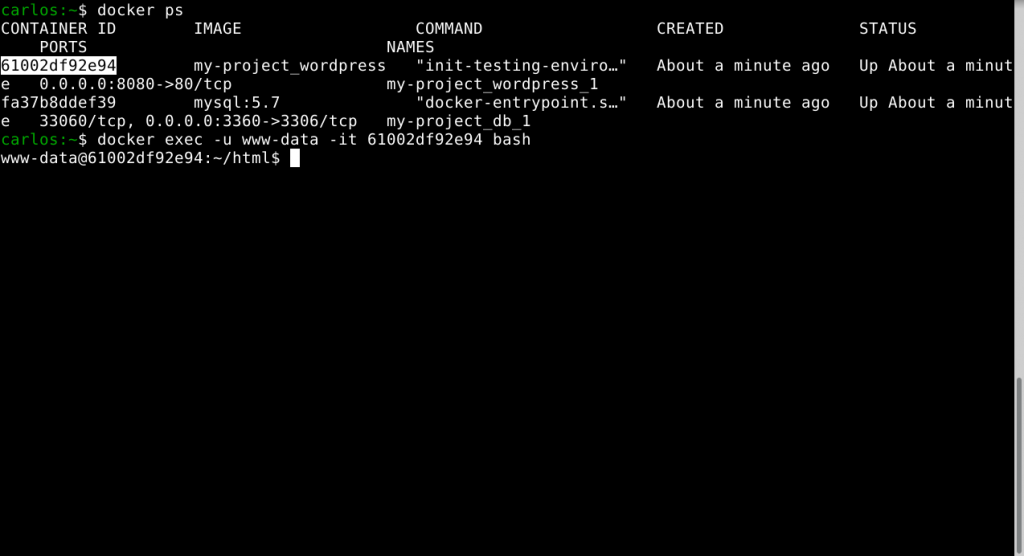
The next time you lunch your container, if you have already setup the WordPress site, then the testing environment will be configured automatically. Then you need a bash session in the WordPress container to run the tests:

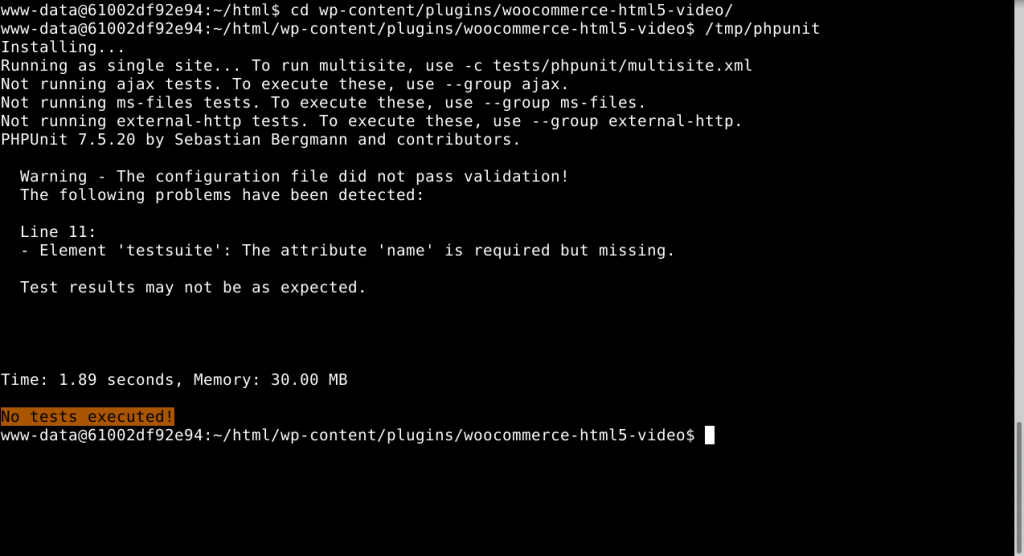
An alternative is to use composer and install PHPUnit in the plugin’s source code. In the step 2, I already downloaded it and place it in the tmp folder:

If you want to run your tests automatically while you are coding, you could take a look to a previous article where I explain how to run tests automatically using the bash script watch-and-do.
So this is the way I run PHPUnit tests in a WordPress plugin with Docker. You can find these configuration files in Github.
UPDATE(2020-06-17): Change on step 3 with a fix in the script.

Great article! This helped me setup a local development environment super fast!